
E6 | Essex County Colonial | Removed, Reused and Reclaimed
Season 48 Episode 6 | 23m 42sVideo has Closed Captions
Kevin sees antique wavy glass harvested to repair the home's original windows.
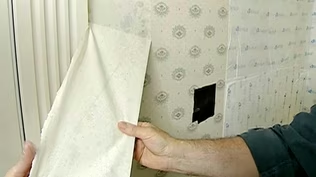
Kevin O'Connor learns from painter Carter Henry why removing wallpaper in an old house is unpredictable. The original wavy glass windowpanes are repaired. Out back, Zack Dettmore and Justin Taylor install a cedar bracket to support the new mudroom roof. Later, Zack visits a local mill that turns 130-year-old timbers into southern yellow pine flooring for Ethan and Harley.
Problems playing video? | Closed Captioning Feedback
Problems playing video? | Closed Captioning Feedback
Funding for THIS OLD HOUSE is provided by The Home Depot and Renewal By Andersen.
Support provided by:


E6 | Essex County Colonial | Removed, Reused and Reclaimed
Season 48 Episode 6 | 23m 42sVideo has Closed Captions
Kevin O'Connor learns from painter Carter Henry why removing wallpaper in an old house is unpredictable. The original wavy glass windowpanes are repaired. Out back, Zack Dettmore and Justin Taylor install a cedar bracket to support the new mudroom roof. Later, Zack visits a local mill that turns 130-year-old timbers into southern yellow pine flooring for Ethan and Harley.
Problems playing video? | Closed Captioning Feedback
Where to Watch This Old House
This Old House is available to stream on pbs.org and the PBS app.
Keep Exploring

This Old House Insider Newsletter
Get This Old House exclusive stories, tips, and behind-the-scenes information delivered right to your inbox every month.Providing Support for PBS.org
Learn Moreabout PBS online sponsorshipKevin: Today on "This Old House"... Wallpaper removal in older homes is unpredictable.
It could take minutes or days.
We'll tell you why.
And we'll harvest glass from this antique window to repair this one so we don't lose those signature waves.
Zack: Then I'll show you how we take 130-year-old lumber and turn it into new Southern yellow-pine floors.
♪ Man: That's it.
♪ ♪ ♪ Kevin: Hey, there.
I'm Kevin O'Connor, and welcome back to "This Old House" here in Essex County, New Jersey, where we are thrilled to be working again with Zack Dettmore, our general contractor, and his team on this beautiful 1890s Dutch Colonial Revival.
Now, since we were here last, all of our mechanical rough-ins have been completed and inspected, which allows us to move on to insulation.
Yesterday, there was some closed-cell insulation installed in spot places, like up in the attic, and today, we're getting fiberglass batts installed on most of the exterior walls.
And in the basement, you may recall that we pulled a new 4-inch sewer line from the street to the house.
That trench down in the basement has been backfilled and now has a new layer of concrete on it.
And with all of that behind us -- hey, good morning, Ben -- we still have got a bunch to do.
Zack, good to see you.
Zack: Hey, Kevin.
Welcome.
Kevin: Thank you.
How you feeling?
Zack: Oh, feeling great.
The logistical nightmare of having to align the inspections is always stressful.
Now that we're through that, all hands on deck, get this job done.
Kevin: Let's go.
I'm up for it.
Zack: Alright.
So, we got wallpaper upstairs and downstairs that they don't want to keep.
So Carter's the guy to remove all this stuff.
Carter: Nice to meet you.
Zack: I'll let you guys take it from here.
Kevin: Oh, thanks.
He's running away from the wallpaper.
He's smart, huh?
Carter: Yeah.
It's never a fun process, but a process that has to happen regardless, so... Kevin: It's on a lot of old houses, right?
They loved it for a while, so it's everywhere.
Carter: Oh, yeah.
We've done some houses where it's in every room.
Kevin: And what do you think about the taking-it-down process?
Carter: Well, you know, it's a little bit of trial and error.
So, normally, we start with a steamer and try and go that approach first, where we use it on the walls and the steam gets through the wallpaper and lifts it from the actual glue.
In this case, we tried that.
It didn't work.
So we had to use a different tool, which is a wallpaper-scoring tool.
It has these little serrated blades on the edge of it.
And what you do is, you run it over the wall, and it makes little, tiny holes, and it -- allowing the chemical stripper to actually soak through.
And the enzymes will lift the glue and let the paper come off the wall.
Kevin: You're on sort of the second option.
I see Kennedy's got the sprayer going.
Is it typical, when you're taking this off, that you never know what you're getting into?
Carter: You never really know.
Kevin: Yeah.
Carter: Yeah.
It all depends on how the wall was prepped prior to the paper.
You know, it really should have been primed.
Some people didn't do that.
And then what you're going to encounter then is the paper is actually going to lift part of either the plaster or the drywall off of the wall itself.
And then it makes just a mess when it comes to actually prepping the wall, then, to get it ready for paint.
Kevin: Have you sprayed once or more times?
Carter: We've soaked this wall a couple of times after scoring it with the scoring tool, and what that's just doing is softening it up, and it's going to make it easier to take it off.
But, you know, it's definitely something that requires some patience, and we got to go little by little to get it all off of there.
Kevin: The other big thing is that it's only a single layer of wallpaper, right?
I'm sure you've seen cases where there's been more than one.
Carter: Oh, absolutely.
Yeah, we've come across that quite a bit where people did wallpaper over wallpaper.
And we've even had some scenarios where people just painted over wallpaper.
And that's just a total nightmare, because you can't get anything to get through that paint.
And at that point, you're better off just replacing the wall.
Kevin: Yeah, I know that one well.
So, he'll keep going, obviously.
And this looks like it's to, you know -- looks like he got lucky, quite honestly, that it's coming off.
Carter: Mm-hmm.
Kevin: When you expose it down to that sort of beige color, do you wash or are you just hoping that the primer will take care of that?
Carter: We'll still wash it.
We'll probably even hit it, you know, with a pad sander real quick, just to kind of take anything else off.
And then we'll go through and prime everything.
Yeah, we're trying to leave it as clean as we can to make it as easy as possible for the next tray to come in and prep these walls.
Kevin: Awesome.
Well, I appreciate the information, and your guy's killin' it for us, so thank you.
Carter: Absolutely.
Thank you.
Kevin: Alright, Carter.
♪ The windows in our house are original to 1893, both the sash and the glass.
And when you have glass from 1893, well, it's very distinctive.
Ours is full of waves.
Have a look at the reflection.
You can see the waves right there.
Unfortunately, though, we have some breaks.
These panes are broken here and here.
And if we were to replace that with brand-new glass, well, it would be perfectly clear.
It'd be like a poke in the eye.
It'd be all you see.
So we've got a crew on-site that's actually going to harvest some of the original glass from other windows, as well as their archives, and make repairs that we'll never notice.
Ben, Gordon, good to see you guys.
Ben: Good to see you.
Gordon: Oh, yeah.
Kevin: So, we appreciate the help.
This window is a problem, too, right?
Ben: Yeah.
It's cracked here and there.
Kevin: Okay.
Ben: This piece is big enough to make the three pieces we need over there.
Kevin: So harvest this.
Ben: Yeah.
Kevin: Cut it up.
Yeah.
Ben: Exactly.
Kevin: And then what goes in here?
Ben: So, in here, we've got a window that we salvaged from another old house.
It's got a big piece of wavy glass in it, even bigger than this, so we can cut it down to size and fit it in.
Kevin: And, obviously, you pulled this out of the opening.
How did you get this lower sash out?
Ben: So, we cut the paint line that held the stop onto the side that keeps the sash in place.
We pried this off.
We removed the chains from both sides of the sash.
Kevin: Yep.
Ben: We tied them in knots so they don't fall down the pulley hole.
Kevin: Yeah.
Ben: And let them rest there and put this on the table and get to work.
Kevin: And the process going forward is what?
Gordon: First things first is just to deglaze it, get rid of this old material.
Kevin: Nice and clean.
Glass is still secure, though?
Gordon: Yep.
So, last thing to do is pretty much pop out these metal points.
Kevin: Alright.
Gordon: That'll loosen up the glass.
Ben: Yeah, these hold the glass in, especially while the glazing is drying.
Kevin: Yeah.
Ben: Keeps it nice and firm.
Kevin: Can I see that?
Ben: Sure.
Kevin: Yeah, so, you get the idea right there.
Pointed and sharp so that you can force it into the wood.
Now what?
Ben: Now we're going to try to get the two broken corners out of the way and then pull the good piece out.
Gordon: Anybody home?
Ben: Gordon, you want to do the honors?
Gordon: Let's give it a try.
Kevin: Whoa, whoa.
What's the hammer?
Ben: Gordon's gonna hit the bottom of the bottom rail, and that should move the whole frame forward.
Kevin: There it is.
Look at that.
Kevin: So, will you just mind holding that up?
Let me just check out some of those waves.
Gordon: Yeah.
Kevin: Oh, yeah.
Yeah, no mistaking it there.
♪ That's the magic right there.
It's not a cut.
It's just a score.
What do you call these?
Ben: Running pliers.
One jaw is convex, and the top jaw is concave.
So if you can imagine your glass laying in between them with the score in the center, when you squeeze them together, it snaps along the score.
The score is just the path of least resistance, but we're breaking the glass.
That's how we cut it.
♪ That's another way to snap it.
Kevin: You got two openings ready for us, Gordon?
How'd you prep these?
Gordon: I scraped out all that glaze, got it back down to the bare wood, and then we applied shellac just to act as a barrier between the wood and the glaze.
Now I'm just going to add a layer of bedding so that when we lay the glass in, it's not just wood-to-glass.
Kevin: How'd your guy Ben do with sizing?
Gordon: Yeah.
Kevin: Good?
Gordon: Pretty good.
Kevin: Modern-day glazing point.
Sort of a little bit more convenient point to push in, but it gives you the little tabs there for your putty knife?
Gordon: Mm-hmm.
Now we can do a final glazing.
Kevin: This glazing process, it hasn't changed.
Gordon: Because it just works.
It's simple and effective.
It takes a couple months for it to be ready to paint, and by that time, it'll be pretty solid.
And the last step here is just to clean up the window.
Kevin: So, what do you got there, Gordon?
Gordon: This is the whiting powder.
It's gonna absorb any excess oils off of the glass.
This whiting powder also helps the glaze set.
♪ Kevin: Look at that.
What do you think, Ben?
Good?
Ben: Looks good.
Kevin: You approve?
I think it looks fantastic.
Well done, guys.
Gordon: Thanks.
♪ Zack: So, over here at the back of the house, originally, there was a deck that was accessible off that door.
Now we've got the mudroom entrance and there's this new roof that overhangs.
We could have a post coming down, but it would land right between these two sets of stairs.
So this temporary bracket we have is supporting the roof, and the architect has designed a new bracket that is going to support that load.
So, Justin, the engineer, had to do some specifications on this.
Right?
Justin: That's correct.
So, first, the architect came up with this design, which he ran by the homeowners, and they approved.
And then he worked with his engineer to determine the specifications for both the post size, which, in this case, is a 6x6 cedar post.
The engineer then provided a specific fastener schedule that calls for 6-inch-long timber screws.
Zack: Okay, so, we're ready to put it in?
Justin: We are ready to put it in.
Zack, so, we've already put this string line up, which references the outside edge of our bracket.
And we can use this as a way to determine the angles that we need to cut at the top and the bottom of the bracket.
Zack: So the bracket is coming up here and supporting this beam.
We need to know the angle to cut the top of the bracket.
So we will use this angle finder.
I'll reference this side on the bottom of the beam, and this side will be the outside of our bracket.
And that should be able to get us a perfect angle.
So I just need to get that lined up right to the string so it's just kissing it.
And we can see, in the viewfinder, the angle.
Justin: Now I'll measure the bottom one.
Zack, this angle is 30.4.
So we can take this over to the 6x6, transfer the angle, and start to make our cuts.
Zack: Alright, looks good.
Let's do a measurement on the outside of this.
Use my square as a reference.
You good, Justin?
Justin: Got a little belly in that tape, Zack.
Zack: You ready?
84 5/16.
Alright, Justin, let's do a practice cut, because we don't want to risk getting it wrong on this cedar beam.
Justin: Sounds good, Zack.
I'll take the angle finder, lay it on the 2x6 we're going to use as a template.
Mark a line that represents the bottom of the bracket.
Zack: If you hold the tape there, I'll go to 84 5/16.
That's what I said, right?
Justin: Excellent.
And then I'm going to change the angle finder back to 61 degrees.
Zack: Alrighty.
Justin: Which is the top measurement.
There you go.
Zack: Okay.
You want to make a cut on that side?
Justin: Let's do it.
Zack: Alright, let's see how it looks.
My angle is great.
How's yours?
Justin: Looks good to me, Zack.
Zack: Alright, let's lay our template on top of this cedar post.
How's that look there?
Justin: It looks good.
Zack: And we want to reference the outside here, because that's where our string line was.
You good there?
Justin: I am good there.
Zack: Alright, let's make a mark.
Justin: There you go, Zack.
Let's give it a test-fit.
Zack: I'll put it down on that cleat there.
Okay.
How's it look down there?
Justin: It looks good.
Zack: This is perfect up here.
Now let's lay out our fasteners.
Justin: The engineer provided us with the spacing of the six fasteners that we're going to be using.
So, I'm going 6 inches up from the bottom.
And then I'm going to be going and inch and 3/4 up from that two times.
And then I'm going to use a combination square set to an inch and 3/4 to mark the center of each fastener.
And then we'll be drilling here, here, here, here, here, and here.
I start by using a drill-press attachment.
This tool allows me to keep the plug cutter centered as it enters the wood.
That plug allows me to cover the hole, which disguises the fastener that holds the bracket in place.
Alright, Zack.
Here you go.
Zack: Thank you.
Justin: You're okay up there, Zack?
Zack: Yeah.
So, I'm going to put some adhesive in these holes, and then we'll put these cedar plugs we made right in the hole.
So, once this glue sets up, we're going to cut these flush and sand everything, put some epoxy in any of the checking that's happening.
Then we can prime the whole bracket.
♪ Ethan and Harley loved the old Southern yellow-pine floors in their house, but, unfortunately, when we got down and inspected them, we saw they were just too thin to sand, so we had to remove all of them.
But they didn't want to lose that character.
So we've come to a local mill that's only about a few miles away from the project house, and, here, they take old-growth timbers like this and they mill it into floors like this that are nice and new.
Let's see how they do it.
Hey, Anthony.
Anthony: Hey.
What's up, Zack?
Zack: Nice to see you.
Anthony: Likewise.
Good to see you.
Zack: Tell me a bit about the type of work you do here.
Anthony: If it's got to do with reclaimed wood, we do it -- the long and the short.
But process old timber, old lumber and make new product out of it.
Zack: Which is great.
It's exactly why I thought of you, because our homeowners really wanted what they had, which was a soft-wood look, but with that durable old-growth characteristic.
Anthony: Absolutely.
Zack: So, how do you get that?
Anthony: I mean, we get a lot of wood from all over the place, but for your particular project, it was only 20 minutes away, in Plainfield.
It was a turn-of-the-century building, you know, so right around the same time period as your client's home.
And we salvaged all, you know, the vertical posts, the floor joists, the decking, the rafters.
If it was salvageable, we got our hands on it.
We've got some period-correct material that's going to go into, you know, right about the same-age home.
Zack: Can you show me how you make it?
Anthony: Absolutely.
Let's go for it.
Zack: Sweet.
So, what's our first step, Anthony?
Anthony: So, our first step is taking this timber that was one of the posts on the second floor and really start to dissect and pull any sort of metal contaminants that may be in the wood so that we can process it.
Zack: Right.
So unlike a normal flooring supplier, where you start with just a nice clean tree, you don't know what's in here.
Anthony: We're going to find out.
Nails, screws, staples -- it's all got to come out.
Zack: Alright, great.
How thorough do we need to be here?
Anthony: The transformation of this timber stops here if we don't remove the nails or any sort of metal contaminants.
We can't put it through the equipment.
Zack: I'll be thorough.
Anthony: Yeah, please do.
Zack: [ Laughs ] Anthony: So, once we've got everything visible, we're going to break out the metal detectors and really see what's hiding on us.
And we usually use just the front portion of the metal detector, because if you just pass the wand, it just kind of gets lost.
So if you got a -- If you catch a beep -- Zack: Oh, there it is.
Yeah, you're right.
Anthony: There you go.
Zack: Just skipped one.
Alright.
So, it's definitely a slow process.
Anthony: It takes time, but it's a necessary step.
Zack: Well, I'm impressed.
What's the next step?
Anthony: Let's go off to the resaw.
Zack: Let's do it.
Anthony: Let's go check it out.
Zack: So, are these the actual beams we're using?
Anthony: These were some of the floor joists and the rafters out of Plainfield.
They've been through the de-nailing process.
We know that they're clean and clear.
From here, we're going to take this and cut it into a 1-inch flooring blank.
Zack: Alright, let's look in here.
Oh, my gosh!
Anthony: Check that out.
Zack: That's amazing.
Look at how tight those growth rings are there.
Alright, so, what's the next step?
Anthony: Alright, so, this is one of the three kilns that we run.
The next step for the material that just came off the band saw will disappear in here for about a week and a half, two weeks, or so.
We remove the additional moisture that does not need to be in there, get it down to where it's a workable moisture content.
Zack: So, it's surprising to me a board like this that just has been sitting around for over 100 years still has moisture in it.
Anthony: It's incredible what it hangs on to.
But let's see what the moisture meter has to say.
15%, 16%.
It's way too high to go into a customer's home, especially nowadays with all the heating systems and forced hot air, the heat pumps, and all these, you know, almost net-zero homes that are very well-insulated.
That house, in essence, becomes the kiln for the wood.
So it's going to pull all that additional moisture out of the material, and the wood's going to -- Naturally, it's going to react as it naturally does and shrink.
Zack: Right.
Anthony: There's going to be problems.
Zack: What's the moisture content on that piece of wood?
Anthony: This one came out a little while ago.
It's cooled down now.
We want it 6% to 8% is ideal.
9% is acceptable.
Anything over that is -- it needs more time.
Alright, so, we're off to the next step, here at the planer.
Zack: Alright, so, you're basically just going to skin off the layer to make this board more refined and consistent?
Anthony: Precisely.
And on top of that, it's also going to remove any extra pitch that we may have built up on the surface and just make it, to your point, much more consistent.
We want two nice parallel sides.
Zack: Got it.
And by "pitch," you mean this sap that's sort of leaching out after the kiln?
Anthony: Exactly.
Exactly.
That's just the resin that's been hanging out in that knot for the past 300 years.
We really want to get it to a point where it's passable, because the pitch and the equipment -- not exactly friends.
It just causes slowdowns.
So we're gonna let the planer do all the heavy lifting for us.
Zack: That looks awesome.
Anthony: Incredible, right?
So, we're going to refine it just that much further.
Now we're off to the straight-line rip.
We'll size it down in preparation for the molder, where we'll get the tongue, the groove, the relief cuts, and the final face plane.
Zack: This is the molder?
Anthony: This is the molder.
This is where we're going to take that flooring blank that we just made, that we just saw is down on the straight-line rip, and it's going to pass through this machine with those two face planes, two on the bottom side, with relief cuts, and also the tongue-and-groove.
It's a great machine.
Zack: Anthony, this looks incredible.
Anthony: Big difference, right?
Zack: I gotta say, this actually looks better than what was in the house.
It's a lot tighter-grained, but still that tough, hard pine we were looking for.
Anthony: Very dense.
Yeah, it's incredible.
Ready to go to the house to acclimate and be installed.
Zack: Great.
And we're going to get it sanded probably in a month or two, and then we got a finish on it.
It'll look like it's been there for 130 years.
Anthony: That's the plan.
Zack: Dude, thank you so much.
Anthony: Likewise.
Zack: This is perfect.
Anthony: Appreciate it.
♪ ♪ ♪ ♪ ♪ ♪ ♪ ♪ Kevin: Next time on "This Old House"... We are taking on a very complicated tile job here in the primary shower, and hopefully we'll be making as few cuts as possible.
Zack: We'll install custom kitchen cabinetry that fits seamlessly with every angle of the walls and floors.
I kind of felt, when I moved it, that it, like, keyed in.
Man: Popped into -- Yeah.
Zack: Yeah.
And we'll show you how to make this 130-year-old tub look brand-new.
Kevin: That's next time.


- Home and How To

Hit the road in a classic car for a tour through Great Britain with two antiques experts.
 New Episode
 New Episode










Support for PBS provided by:
Funding for THIS OLD HOUSE is provided by The Home Depot and Renewal By Andersen.